
Calisthenics workouts and bodyweight training exercises involve a range of gross motor movements along the joints such as sideways, backwards, or forwards.
The wrist joint, in particular, is one of the most crucial to facilitate your mobility and flexibility when performing calisthenics exercises such as handstands, planche and false grip techniques, among others.
Table of Contents
What Leads To Poor Wrist Mobility?
During calisthenics workouts, lack of attention to the wrist joint flexibility may lead to an excessive or unbearable amount of weight and excess placed on the wrists.
In addition, health problems such as arthritis may also interfere with the wrist mobility and increase the risk of injuries to the muscles, nerves, connective tissues, ligaments, and bones that make up the wrist joint.
As a result, this may create discomfort and pain when attempting multiple ranges of movements along the wrist joints transitioning between the forearm and the hand.
How To Improve Wrist Flexibility And Strength
Performing a number of regular exercises can help to maintain and improve the flexibility and gripping strengths in your wrists, and should be part of your regular Calisthenics workout program.
Some of these exercises include:
#1 Rotation of The Wrist or Forearm
Wrist rotation is one of the basic exercises to enhance flexibility. It involves holding out your arms in front of you, wrapping your fingers together, and twisting the wrists around in different directions, similar to the movement actions of a screwdriver or a doorknob.
If you experience stiffness or pain of the joints, you can make the wrist rotation movement easier by bending your elbows and bringing your wrists closer to your chest, that way the full range of movement is reduced.
For this exercise, rotate the wrists in both directions, 10 times per wrists. Repeat throughout the day as necessary.
#2 Wrist Walks
This is a creative exercise where you place your palms flat against a wall, with your arms straightened and the fingers pointing to the ceiling.
Maintaining contact between your palm and the wall, walk down the wall with your hands until you reach a point where your hands cannot walk any further without your palms losing full contact with the wall. From this point, reverse the direction of your palms so that your fingers point towards the floor, and then walk the hands back up the wall to the farthest point possible.
Repeat the process as many times as you desire.
#3 Levering
Wrist Levering is an exercise performed when in a standing position. Grab a heavy bar, and with your arms hanging down by your side, hold it with your hand positioned centre on the bar, thumb closest to your body and knuckles away.
From this position, your wrist moves in the direction of force (resistance) as you lever the bar, upwards and downward.
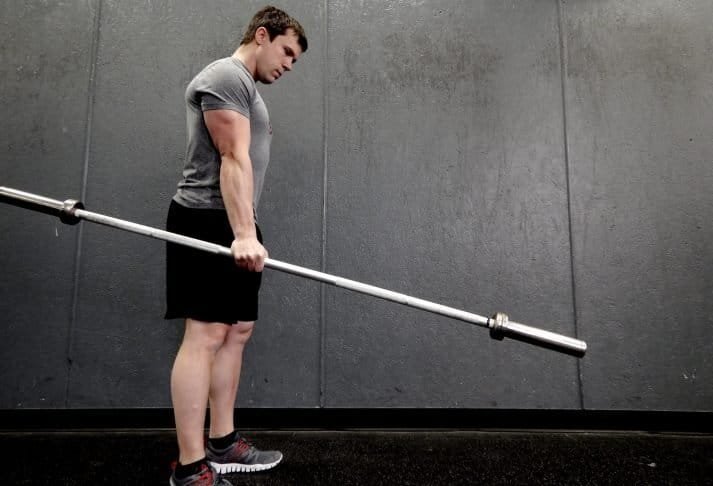
(Image via nerdfitness.com)
Lever the bar up and down, for as many cycles as you can, up to 10 cycles, and repeat for 3-sets on each of your wrists.
The exercise is intended to improve the flexibility, stability, and strength of the wrist, and can be modified by changing the weight of the bar.
#4 Front Squat Rack Position
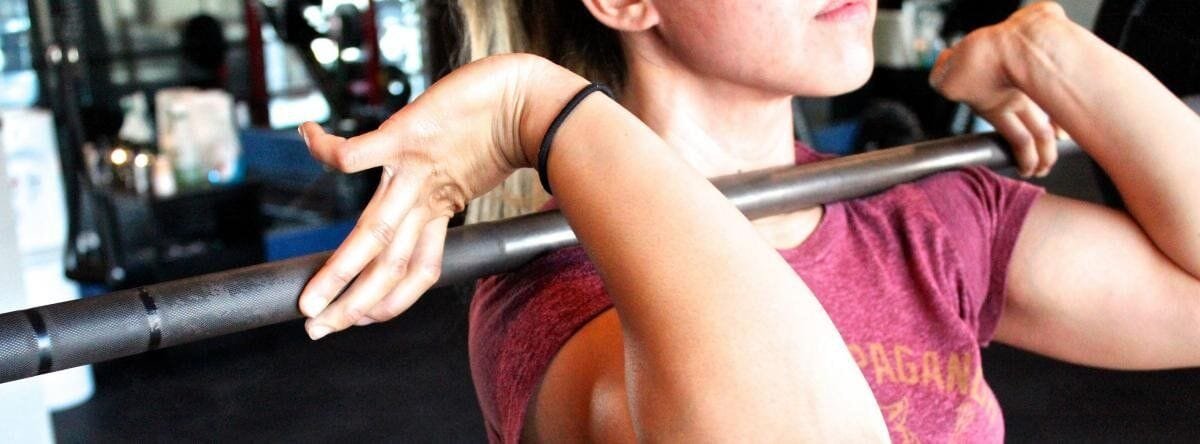
Ideally, the correct front squat rack position is when your shoulder blades are back, chest/thorax cleared up, and your elbows up high to support the weight of the shoulders.
In this position, do a front squat by grabbing a heavy bar and resting it on top of your shoulders, such that your elbows stretch forward with your forearms parallel to the ground, giving way to your wrist’s rotation. Hold this position for about 30 seconds and repeat it 2 or 3 times.
The primary focus of the front squat rack position is to improve the restricted range of wrist joint motion. Try using just a bar at first, but as you progress you can add weights to the bar as and when you desire.
Through this exercise, you maximise the strength of your scapular rotator cuff muscle to reduce the tension from some tight group of muscles (flexors and extenders), such as latissimus dorsi, teres major, posterior deltoid, and triceps.
This involves a series of muscle actions aligned to transition the movements between the hand and the forearm from the upper thoracic spine through the shoulders/scapula, to the elbow, and then the wrist joint.
#5 Elastic Band Extensions
Get hold of two or more elastic bands and wrap them around all five fingers. Using the fingers, perform rubber band extensions by opening and closing your pinched grip, as many times as possible. Ensure you alternate wrists.
The simple rubber band extensions are similar to closing grippers, which allows blood flow through the hands to balance the grip strength and improve the flexibility of the wrists.
#6 Planche Leans / Planche Push-ups
Planche leans and planche push-ups allow you to use your body weight to put stress on your wrists to improve strength, both in a front/side-facing and back-facing hand position.
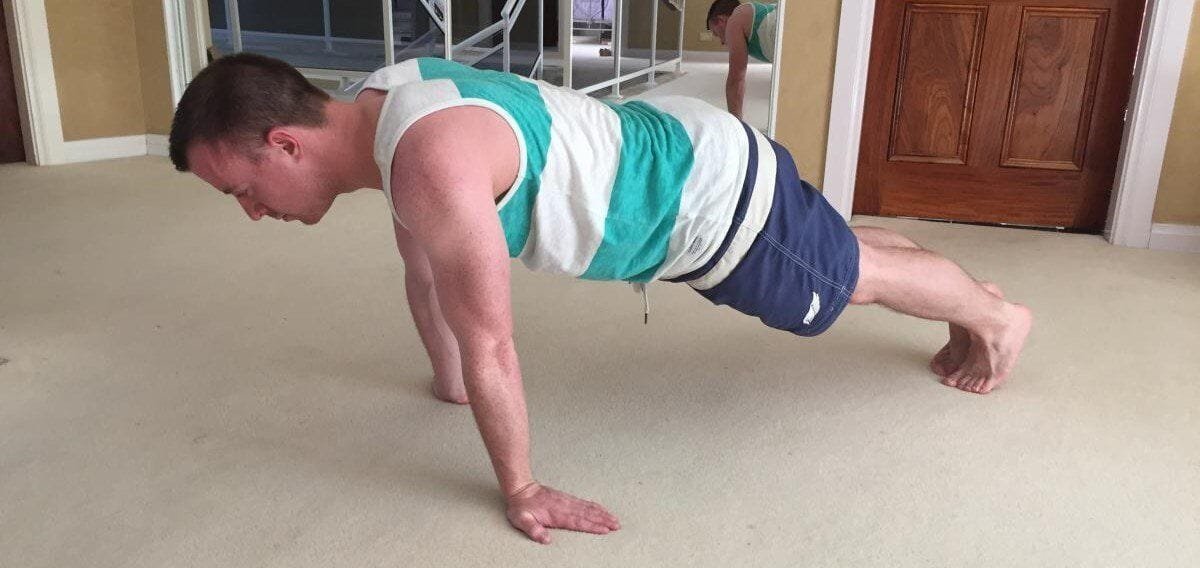
Planche leans are a static hold, where from a starting push-up position (extended straight arms), you want to lean your weight forward to flex the wrists. Your palms should be in a position where the fingers face forwards or outwards, in order to find a position which is comfortable, yet feels challenging on the wrists.
Hold this position as long as you can for about 20-30 seconds and repeat for 3-sets.

Planche push-ups put similar levels of stress on the wrists in order to increase strength. Start with your hands inwards such that the fingers points towards your knees, and perform push-ups from this position. Positioning the hands so that they are beneath the nipples, rather than closer to the shoulders may help with this push-up variation.
Aim for 3 sets of 10-12 reps here.
#7 Static Holds
You can do this simple stretch with your forearm on the top of a table or bench and the palms hanging over the edge, facing the floor.
From here, alternate static holds with your fingers pointing up to the ceiling or down to the floor (pulling your wrist into flexion or extension), and hold each for about 20-30 seconds before alternating between the two.
Perform a total of 10 repetitions on each of your wrists.
You can also hold a small but heavy object in your hands to intensify this hold.
Why Should You Focus On Maintaining Healthy Wrists?
More often than not, the majority of those training Calisthenics and Crossfit experience some sort of soreness and wrist pain during training.
The pain is associated with the increased tension created along the wrist joints when making complex ranges of movements such as flexion/extension of the palm and adduction/abduction, side-by-side movements of the hand. Poor wrist mobility affects your grip strength, which directly impacts negatively on your performance during workouts.
In order to avoid various functional performance limitations associated with poor wrist mobility, it is critical to protect and maintain our wrist joints. To do this, you must first understand the various ways you can improve the wrist flexibility and strength, before putting this to practice and moving closer to your Calisthenics training goals.

Founder of www.calisthenics-101.co.uk. Training calisthenics since 2012.
Currently working on: 30 second one-arm handstand, muscle-up 360, straddle planche.