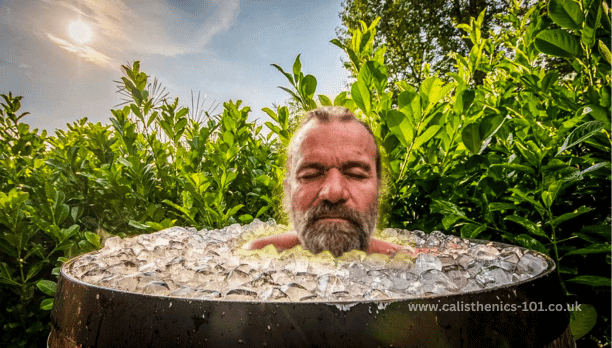
Have you ever wanted to get an ice bath in your home? Well, we fully understand if you have.
Cold water immersion techniques like ice baths have become a go-to for athletes, wellness enthusiasts, and even thrill-seekers looking for a chilly adventure. But if you’ve ever marvelled at the incredible benefits of ice baths but cringed at the price tag of commercial setups, we’ve got some exciting news for you.
In our DIY guide, we’re going to show you how to build your very own ice bath right in the comfort of your own home. From choosing the right materials to getting the temperature just right, we’ve got you covered. So, get ready to embrace the cold and unlock the secrets to faster recovery and heightened endurance.
Let’s dive in!
Table of Contents
How To Make Your Own DIY Ice Bath
Below, we have discussed some of the easiest DIY ice bath ideas.
1. Chest Freezer Ice Bath
One of the best and simplest ways to make an ice bath plunge pool is to use chest freezers. To make an ice bath from the chest freezer, start by cleaning it thoroughly and removing any lingering odours.
Next, place a pond liner or heavy-duty plastic sheet inside the freezer to prevent leaks. Fill the freezer with water to your desired water temperature, typically around 50-60 degrees Fahrenheit (10-15 degrees Celsius).
After that, add ice to the chest freezer to maintain the temperature. You can use a thermometer to monitor and adjust the water temperature to your preference. Once your DIY ice bath is set up, you can use it for cold therapy or a quick cold plunge. Keep in mind that you’ll need to add ice regularly to maintain the desired temperature.
2. Tub Ice Baths
A regular tub can easily be transformed into a simple ice bath. Start by plugging the drain to keep the water from escaping. Fill the tub with cold water to your desired temperature, usually between 50-60 degrees Fahrenheit (10-15 degrees Celsius). Use a thermometer to check and adjust the water temperature as needed. To enhance the cooling effect, you can add ice to the water in stages.
A cold tub setup is an excellent option for those who don’t have access to larger containers like chest freezers or livestock troughs. After filling the tub, you’re ready for a cold bath right in the comfort of your own bathroom. When you’re done, simply drain the tub like you would after a regular bath.
3. Trash Can Ice Baths
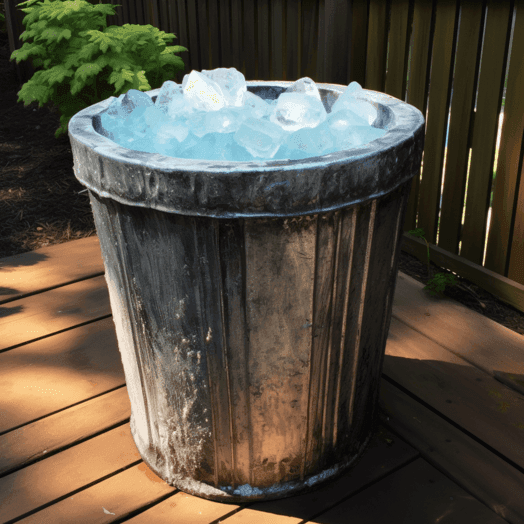
A sturdy trash can can serve as an excellent DIY ice bath container. Choose a clean, large trash can, and make sure it’s free of any sharp edges or rough surfaces that could tear the inner lining. Place a pond liner or heavy-duty plastic bag inside the trash can to prevent leaks.
Fill the trash can with cold water to your desired temperature, typically between 50-60 degrees Fahrenheit (10-15 degrees Celsius). Again, use a thermometer to monitor and adjust the water temperature. To maintain the cold plunge effect, you can periodically add ice to the water. Trash can ice baths are a cost-effective and straightforward option for cold exposure.
4. Ice Barrels
For a more unique DIY ice bath experience, consider using an old barrel. Ensure the barrel is clean and free of any contaminants. Place a pond liner or heavy-duty plastic sheet inside the barrel to create a waterproof barrier.
Fill the barrel with water and then add ice to the barrel to maintain the cold temperature. If the ice barrel is placed on a rough surface, add supports to stabilise its base. Ice barrels add a rustic touch to your cold therapy routine, offering a novel way to experience cold exposure.
5. Livestock Trough Ice Baths
Livestock troughs are spacious and well-suited for DIY ice baths. First, clean the trough thoroughly and ensure it’s free from any contaminants. Then, fill the trough with cold water with a garden hose and then add ice to the trough. Use a thermometer to monitor the temperature.
Livestock trough ice baths are large enough to accommodate multiple users, making them ideal for a cold plunge pool experience at home. When traditional cold showers are not possible, then this is just what you need for a refreshing dose of cold exposure.
How Much Ice Should You Use For A Homemade Ice Bath?
The amount of ice you should use for a homemade ice bath depends on various factors. These include the initial water temperature, the desired final temperature, the size of your ice bath container (whether it’s a tub, trash can, barrel, or trough), and personal preference. Here’s a general guideline to help you achieve an effective and safe ice bath experience:
1. Initial Water Temperature
Start with cold water from your tap. The colder the starting water temperature, the less ice you’ll need to reach your desired level of coldness.
2. Desired Water Temperature
For a typical cold plunge or ice bath routine, aim for a water temperature between 50-60 degrees Fahrenheit (10-15 degrees Celsius). Some individuals prefer it a bit colder, around 50 degrees Fahrenheit (10 degrees Celsius), while others may prefer it slightly warmer.
3. Container Size
Larger containers like livestock troughs or deep freezers require more ice to cool the water effectively. Smaller containers like tubs or trash cans will need less ice.
4. Water Temperature Control
Use a thermometer to monitor and adjust the water temperature throughout the ice bath. This ensures you maintain the desired level of coldness.
5. Adding Ice
Begin by adding a moderate amount of ice to the water. Typically, you can start with 20-30 pounds of ice for a standard-sized bathtub or trash can. For larger containers like livestock troughs or ice barrels, you may need 50-100 pounds or more. Monitor the water temperature and add additional ice as needed.
6. Personal Preference
Your tolerance for cold water exposure varies. Experiment with the amount of ice and water temperature to find what suits you best. Some people prefer just a few minutes in a cold plunge, while others may stay for longer.
Cold Plunge Benefits
DIY ice baths at home offer a cost-effective and accessible way to reap the rewards of cold water therapy. Submerging oneself in icy water, often known as a cold plunge or ice bath, triggers a series of physiological responses that yield numerous health benefits.
1. Improved Circulation And Blood Flow
When you enter a DIY ice bath, your body instinctively reacts by constricting blood vessels, redirecting blood flow toward vital organs, and raising core body temperature. This process ensures that oxygen and nutrients are distributed more effectively throughout your body.
After exiting the ice bath and warming up, blood vessels dilate, which subsequently helps to increase blood flow. This, in turn, can help alleviate sore muscles and expedite the body’s natural healing processes.
2. Muscle Recovery
Athletes and fitness enthusiasts frequently turn to cold water therapy, such as DIY ice baths, to aid in muscle recovery. The cold temperature reduces inflammation and muscle soreness, facilitating quicker recuperation between workouts. The higher blood flow during ice bathing also assists in flushing out metabolic waste products from the muscles.
3. Enhanced Mood And Mental Clarity
Cold exposure can stimulate the release of endorphins, the body’s natural mood enhancers. DIY ice baths have the potential to enhance mental clarity, reduce stress, and boost overall emotional well-being. Many individuals find that the invigorating sensation of a cold plunge can be energising and provide a sense of accomplishment.
4. Increased Immune Function
Regular exposure to cold water may stimulate the production of white blood cells and bolster immune function over time. While a single DIY ice bath won’t make you immune to illness, incorporating cold water therapy into your routine may contribute to long-term immune system benefits.
5. Enhanced Recovery And Injury Prevention
Cold water therapy can assist in reducing the risk of injuries and overuse syndromes. Athletes often use DIY ice baths to help manage chronic injuries or prevent them from occurring in the first place.
6. Weight Management
Cold exposure has the potential to activate brown fat, a type of fat that burns calories to generate heat. While not a replacement for a healthy diet and exercise, DIY ice baths could potentially support weight management efforts.
7. DIY Convenience
By building your own DIY cold plunge ice bath, you get the flexibility to incorporate cold water therapy into your routine whenever you like. There is no need for specialised equipment, which makes it a highly cost-effective alternative to a pre-built cold plunge or a cold shower.
Conclusion
Incorporating a DIY ice bath at home into your routine can bring a myriad of health benefits. Whether you opt for a chest freezer ice bath, an ice tub, or even an ice barrel, these cold plunges offer improved circulation, enhanced muscle recovery, elevated mood, and more.
Remember to maintain safety and comfort, warming up afterwards with a warm shower or taking a plunge in a hot tub. These simple and accessible methods can help you harness the power of cold water therapy, all within the comfort of your own space.

Founder of www.calisthenics-101.co.uk. Training calisthenics since 2012.
Currently working on: 30 second one-arm handstand, muscle-up 360, straddle planche.